Automatic MOsaicingFor an automatic mosaic there are two different algorthms which are used. The area-based algorithm, starts with grey values of spliced images and calculates the gray correlation to two images ( Fu and Wang, 2014). The location of overlap region of the images are used to create the mosaic. The feature-based mosaic algorithm searches for matching feature points form corresponding features of the overlapping images (Fu and Wang, 2014). PCI Geomatica's automatic mosaic tool uses automatic detection and removal of variations in image brightness, radiometric color balancing between images, and automatic cutline determination to minimize the visibility of seams in the mosaic.
Project Setup 1 . Open Geomatica Orthoengine 2014 application by clicking the airplane symbol (Figure 1) 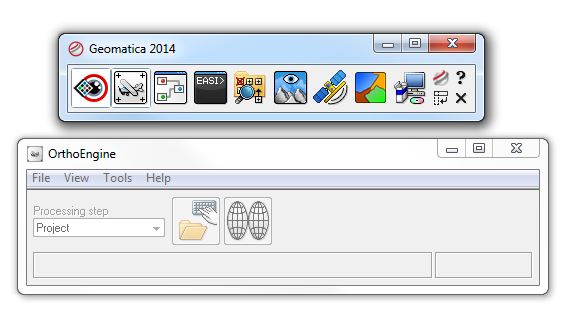
Figure 1 : Project set up.
2 . From the OrthoEngine toolbar select file and then new.
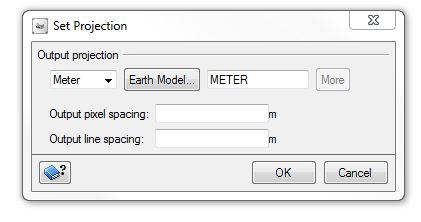
a) Then name your project and give it a description (Figure 2). b) Select none (mosaic only) as the math modeling method ( Figure 2) c) In the following set projection window enter the output projection and resolution (Figure 3) Note: if you select cancel the output projection and resolution will be selected from the first image which is added.
Adding Images to the Project
1 . From the Processing step drop down menu select Image Input (Figure 4) 2 . Click the open a new or existing image button ( file folder) 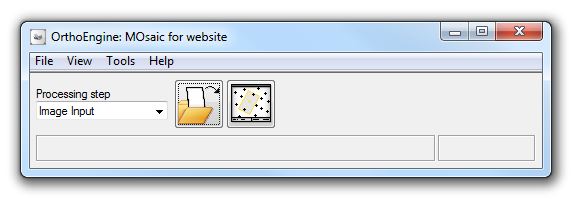
Figure 4: Select image input
3. In the open image dialog box select add image.
4. Add images from the appropriate file. and click close (Figure 5). The images should be preferably in tif format. Note: If the digital images are acquired from several sources and differ in size, format, resolution and number of bands this increases the complexity of mosaicking images (Selivonenko et al., 2000). The image will not load from the file folder if they have varying components such as spatial resolution. 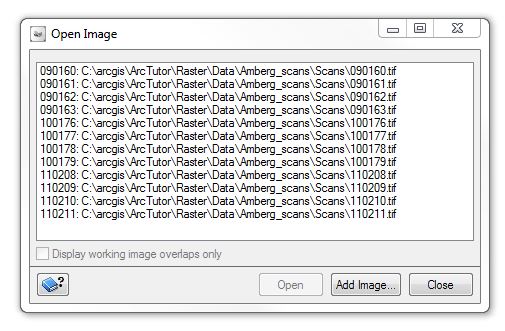
Figure 5: Adding images to the project
Mosaicking
1. . In OrthoEngine select the Display Project Overview button (next to file folder) 2. The following window opens (Figure 6). 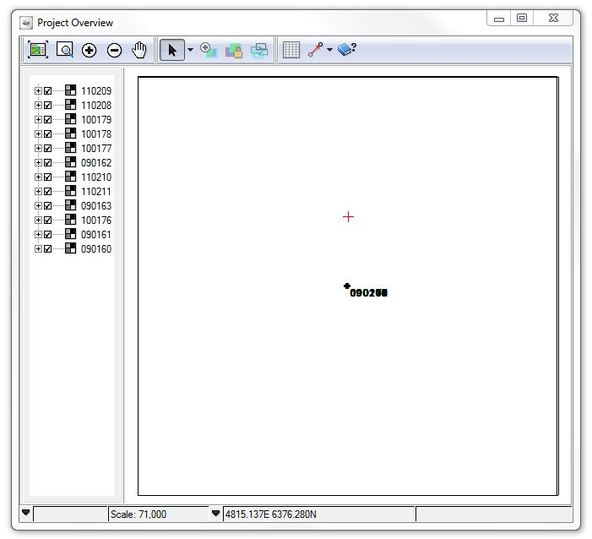
Figure 6: Project Overview
3. Close the window and in the processing toolbar select mosaic.
4. Select the define mosaic area button. 5. Under Mosaic file click browse and find a folder to save the mosaic and give it a name (Figure 7). 6. Keep the default settings and click ok. 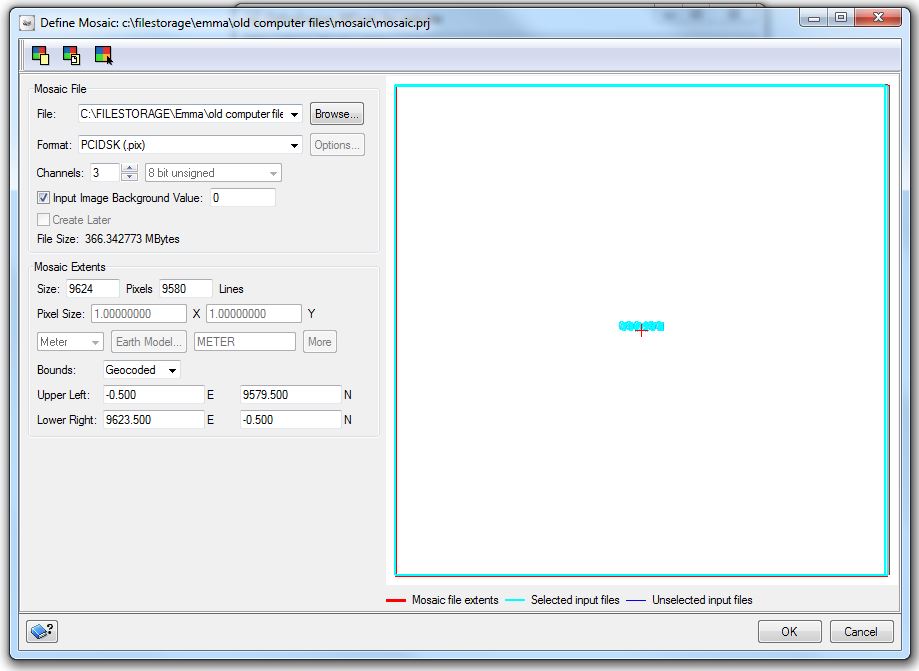
Figure 7: Define mosaic overview
7. In Orthoengine select the automatic mosaic button.
8. In the Automatic Mosaicking panel, change the Normalization method to Adaptive Filter by selecting it in the dropdown list and click Apply All. 9. Under Color Balance, ensure Histogram (Entire Image) method is selected. 10. Check Ignore pixels under bit mask Note: adding a water mask to exclude water and cloud pixels in optional. 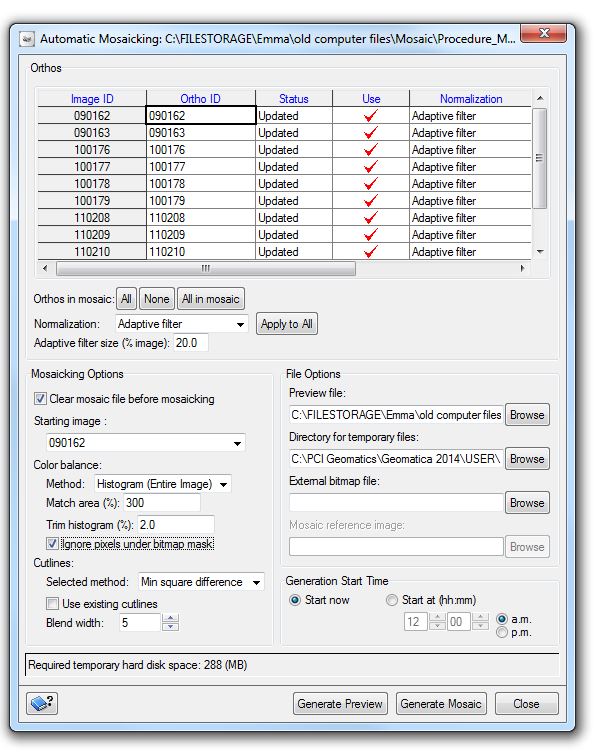
Figure 8: Automatic mosaic panel
11. To generate a low resolution mosaic select Generate Preview. This displays how the automatic settings for colour balance and cutlines will turn out.
12. Select Generate Mosaic for the final output 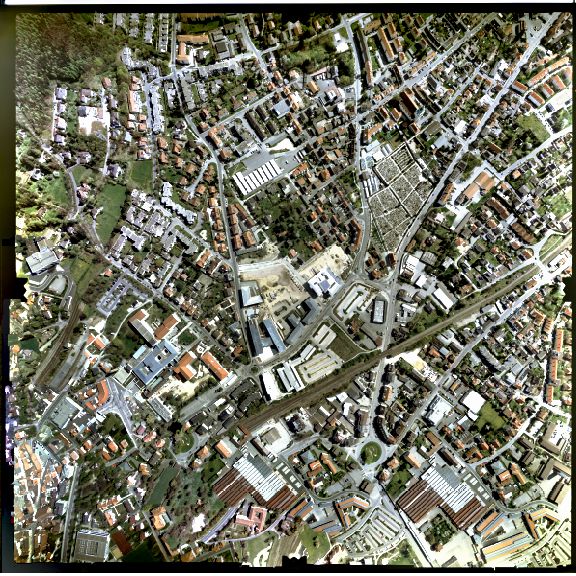
Below is a video from PCI Geomatic which goes through a automatic mosaic with Landsat 8 imagery:
|
ReferencesFu, Zhaoxia, and Liming Wang. "Optimized design of automatic image mosaic." Multimedia Tools and Applications 72.1 (2014): 503-514. http://download.springer.com/static/pdf/657/art%253A10.1007%252Fs11042-013-1387-y.pdf?auth66=1426810643_06f81ec0dc24d67ce8515bbb46e48bbd&ext=.pdf PCI Geomatics. "Geomatica OrthoEngine Automated Mosaicking." 2014. pp.1 -7. Web. 15 March. 2015. <http://www.pcigeomatics.com/pdf/Automatic_Mosaicking_2013.pdf>. Selivonenko, A., Prabakar, N., Rishe, N., & Davis-Chu, D. L. (2000, November). Dynamic Mosaicking of Heterogeneous Digital Images. In ISCA 2nd International Conference On Information Reuse And Integration (pp. 86-90). http://cake.fiu.edu/Publications/selivonenko+al-00-DM.DynamicMosaicking.IRI-2000.prabu.camera_ready.PDF |